You know you have a problem with procrastinating when you realise the fabric you bought and the wooden eggs you painted to make an Easter wreath have been sitting there for a couple of years and you still haven’t got round to making it! That was my reality this morning. I was looking on Instagram and saw a lovely floral wreath made by @justlaurajayne so I decided today was the day the wreath would be made.
I thought maybe some of you would be interested to see how I made it so I’ve put together a tutorial to show you what I did.
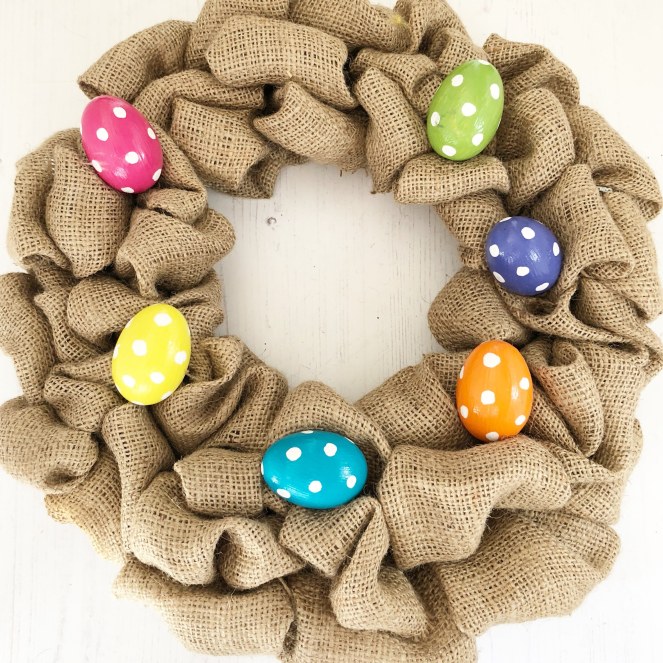
How to make an Easter wreath by RecklessHen
First get together all the supplies you will need. I used
a wire wreath frame
burlap ribbon or strips of burlap
garden wire
a selection of Easter decorations
hot glue gun
glue sticks
a bow, or ribbon/fabric to make a bow
Easter wreath supplies by RecklessHen
For a 30cm wreath frame you will need about 18-20m of burlap ribbon, depending on how full you want your finished wreath to look. I didn’t have any burlap ribbon but I had quite a bit of burlap fabric so I cut it into 12 strips which were about 1.5m long and 6 inches wide.
Start by folding your burlap in quarters and threading a small length of garden wire through it and twisting to secure it. Then use the wire to attach the burlap to one of the spokes of the frame.
Begin pulling loops of the burlap up through the outer ring on the wreath frame. Next pull a loop up through the middle ring and then through inner ring.
Once you have done these three loops, twist the burlap firmly and work your way back up the wreath frame in the opposite direction, pulling loops of burlap through each segment in the wire frame. Continue doing this until you have all the frame filled.
Secure the end of the burlap to the wire frame in the same way as you did at the start, by threading garden wire through it and twisting round the frame.
Lay out your Easter decorations on top of the wreath until you are happy with how they look and then glue in place.
Easter Wreath by RecklessHen
Make a bow and glue it to the wreath, add a loop of garden wire on the back as a hanger and Hey Presto, it’s finished!
Easter wreath by RecklessHen
My wreath is finally hanging proudly on the door and I am off to put the rest of my Easter decorations up.
Today I have been designing new printables to go in the RecklessHen Etsy shop and it has been so much fun being back in the creative zone. I am happiest when I am doing anything creative, it relaxes me and creates a real feel good buzz. So after spending quite a few hours designing some prints and taking photos of them I logged on to Etsy to create the listings in the shop and my feel good mood quickly evaporated! I had completely underestimated the time it would take to get the listings done and how frustrating it would be to think I had finished only to find a mistake somewhere. After checking and rechecking a million times (Ok that’s a slight exaggeration but you get what I mean) I think I finally have them done correctly but I only managed to get 6 items uploaded. I am sure I will get quicker at it the more times I do it – boy I hope so. If anyone has any advice on using Etsy efficiently I would love to hear from you.
Anyways, the first items are now in the shop so I declare it officially open and you can find it here. All the prints will be available in both printed and digital form so you can either print yourself at home or get a ready made print that you just need to pop in a frame and hey presto – new wall art. I love to change the decor in my home by adding a few new prints and some flowers and moving a few decorative pieces from room to room. Such simple, economical little tweaks can change the whole feel of a room without spending a fortune.
Here is a little peek at the new prints in the shop.
Grateful, thankful, blessed print from RecklessHen
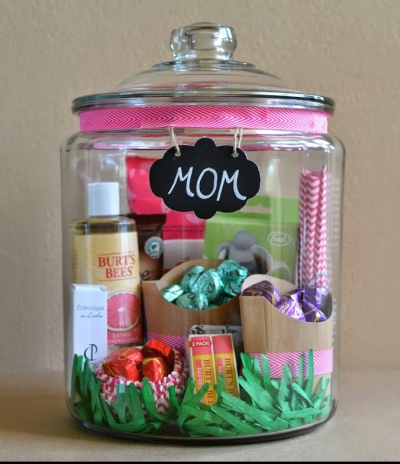
With Mother’s Day looming how many people have forgotten to order their gifts in time for them to be delivered before Mother’s Day? I always do this whether it’s for birthdays, anniversaries, weddings etc. and I end up rushing to the shops and getting something that isn’t exactly what I wanted. So if that is you today then I thought I would do a quick round up of some of lovely, quick make at home gifts that would put a smile on any mum’s face.
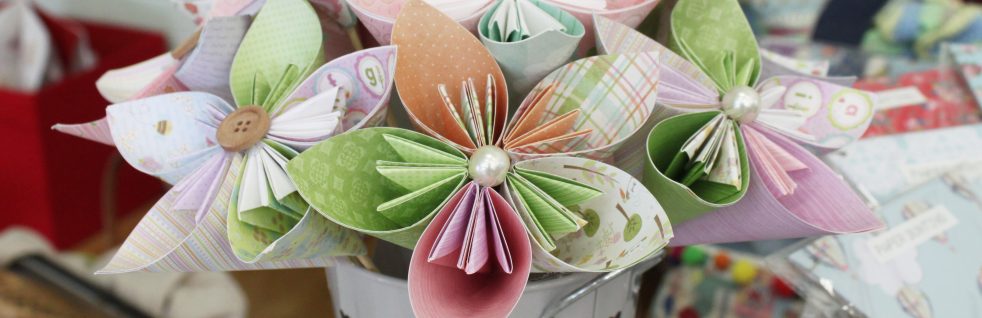
Add some pretty packaging to make a gorgeous handmade gift.
There are loads more fabulous ideas on Pinterest for quick and easy Mother’s Day gifts to make, but I warn you that you may end up spending so much time looking at all the great ideas that you don’t actually get the time to make anything (I speak from experience here lol).
Finally, with Easter just around the corner I thought I would make a cute Easter themed freebie for you. I love to add to my seasonal decor with printables because they are such a quick way to change things up a bit. Please remember that our Easter printable is Free for Personal Use only.
Easter Printable from RecklessHen
The printable will fit in an A4 frame and you can download it here.
Free Easter printable from RecklessHen
If you like our printable please Pin it and if you use it we’d love to know.
Why not follow us on Facebook or Instagram too we would love to see you there 🙂
It seems like ages ago that Tiny Little Lessons suggested that we go on an Instagram Retreat. I liked the sound of it but didn’t have a clue what to expect or who would be going and if I would know anyone or not. We booked our tickets anyway and I looked forward to it even if I was a little apprehensive about meeting so many new people. In the weeks leading up to it there was alot of surfing the net for something to wear and booking appointments to get nails done etc. When Sunday 24th September rolled around we loaded up the sat nav with the location and four of us set off on our road trip to the beautiful surroundings of Larchfield Estate. Even though it is only 30 minutes from home I had never been to Larchfield before and I have to say I was so impressed with how beautiful it is. From the picturesque gardens & courtyard, to the fabulous orangery & barn, to the stunning guest cottages and Myrtle the glamping truck, the attention to detail was just perfect. It was all a real feast for the eyes and many, many photos were taken. I apologise in advance as this post is going to be photo heavy since there were just so many things to look and and drool over.
We started off the afternoon with welcome drinks and nibbles in the Orangery provided by Panacea Drinks, Clearer Water and Graham’s Bakery. They are three local companies and their drinks and food were really good and I will definitely look out for them in the shops now.
Country Blog Retreat NI
Larchfield Estate
Larchfield Estate Country Blog Retreat NI
From the Orangery we headed into the barn which was decorated beautifully and all set up for afternoon tea. It was lovely to be able to put faces to the Instagram names and everyone was so friendly and chatty. After an inspiring talk from Anna from Blossoming Birds we went on a photo walk in the beautiful gardens of Larchfield Estate. There were plenty of props at hand from giant balloons and letters to lovely lanterns. It was funny seeing so many Olympus Pen cameras every way we turned and boy were there so many opportunities to get some amazing photos. Here are some of my favourites.
telephone box by RecklessHen
Secret Garden by RecklessHen
Berries by RecklessHen
Larchfield Estate by RecklessHen
Apple Season by RecklessHen
Follow the path by RecklessHen
Larchfield Estate by RecklessHen
In the garden by RecklessHen
Aplle Path by RecklessHen
Larchfield Estate by RecklessHen
Under the tree by RecklessHen
Larchfield Estate by RecklessHen
al fresco by RecklessHen
Hydrangea by RecklessHen
Where does it go by RecklessHen
After our walk we headed back into the barn for Afternoon Tea which was catered by French Village. The food was amazing and it looked so good no one wanted to be the first to lift something and ruin the photo ops but we forced ourselves 🙂 No words can do justice to how delicious these treats were so I will let the photos do the talking.
Catering by French Village
Catering by French Village
Catering by French Village
Catering by French Village
Catering by French Village
Catering by French Village
Catering by French Village
After lots of eating and plenty of chatting, we heard from some more inspiring local Instagrammers and bloggers. First was Kerry and Tara from Sisters and Sons, followed by Mel Wiggins and then a panel with Rachel from The Breton Bird, Laura-Ann from All That’s Pretty and Anna from Blossoming Birds. All had plenty of good advice and tips and lots of food for thought. We had a short break after this so it was off into the grounds again to have a look at the gorgeous cottages and Myrtle the glamping truck and to take lots of photos of course. First up is Myrtle. Wouldn’t you just love to spend a night here! You even have your very own sauna.
Myrtle the glamping truck at Larchfield Estate by RecklessHen
Myrtle the glamping truck at Larchfield Estate by RecklessHen
Myrtle the glamping truck at Larchfield Estate by RecklessHen
Larchfield Estate by RecklessHen
Myrtle the glamping truck at Larchfield Estate by RecklessHen
Hydrangea by RecklessHen
Myrtle the glamping truck at Larchfield Estate by RecklessHen
Myrtle the glamping truck at Larchfield Estate by RecklessHen
Next up is the cottages. All of them are absolutely gorgeous and I would happily stay in any one of them and be very happy indeed. The decor is flawless and the little touches and attention to detail are so perfect. It made me want to go home and redecorate the whole house.
Larchfield Estate by RecklessHen
Larchfield Estate by RecklessHen
Larchfield Estate by RecklessHen
Larchfield Estate by RecklessHen
Larchfield Estate by RecklessHen
Larchfield Estate by RecklessHen
Larchfield Estate by RecklessHen
Larchfield Estate by RecklessHen
Larchfield Estate by RecklessHen
Larchfield Estate by RecklessHen
Larchfield Estate by RecklessHen
Larchfield Estate by RecklessHen
Larchfield Estate by RecklessHen
Larchfield Estate by RecklessHen
Larchfield Estate by RecklessHen
Larchfield Estate by RecklessHen
Larchfield Estate by RecklessHen
After tearing ourselves away from the fabulous cottages it was back into the barn to hear from Andrew (@littlewoodmr) and Colin (@father_of_the_birds) with a light-hearted look at what life is like as an Insta-Partner.
All too soon it was time to depart Larchfield Estate with our goodie bags filled with treats and offers provided bygreat graet sponsors.
Goodie Bags from the Country Blog Retreat NI (photo copyright @recklesskav)
It was an amazing afternoon spent meeting new people in fabulous surroundings, being fed delicious treats and hearing inspiring words. Thanks to Emma from Life at the Little Wood (@littlewoodlife) for organising it all, can’t wait till next time.
I will leave you with this quote from Brene Brown that Mel Wiggins reminded us of
“Unused creativity is not benign. It metastasizes. It turns into grief, rage, judgement, sorrow, shame.”
In her book ‘The Gifts of Imperfection‘ Brene says that “I’m not very creative’ doesn’t work. There’s no such thing as creative people, and non-creative people. There are only people who use their creativity and people who don’t. Unused creativity doesn’t just disappear. It lives within us until it’s expressed, neglected to death, or suffocated by resentment and fear.”
I love this reminder not to let fear stop us releasing our creativity, to go full steam ahead and live our best life on our own terms. We will make mistakes as we go and that’s OK, just learn from them and move on. I’m definitely going to print that quote out and post it somewhere I will see it everyday.
We are so excited to be able to tell you that our Spotty Dottie font is now available on dafont.com. Spotty Dottie is available free for Personal Use. If you are interested in our Commercial Licence please email us for details.
Spotty Dottie font by RecklessHen (free for Personal Use only)
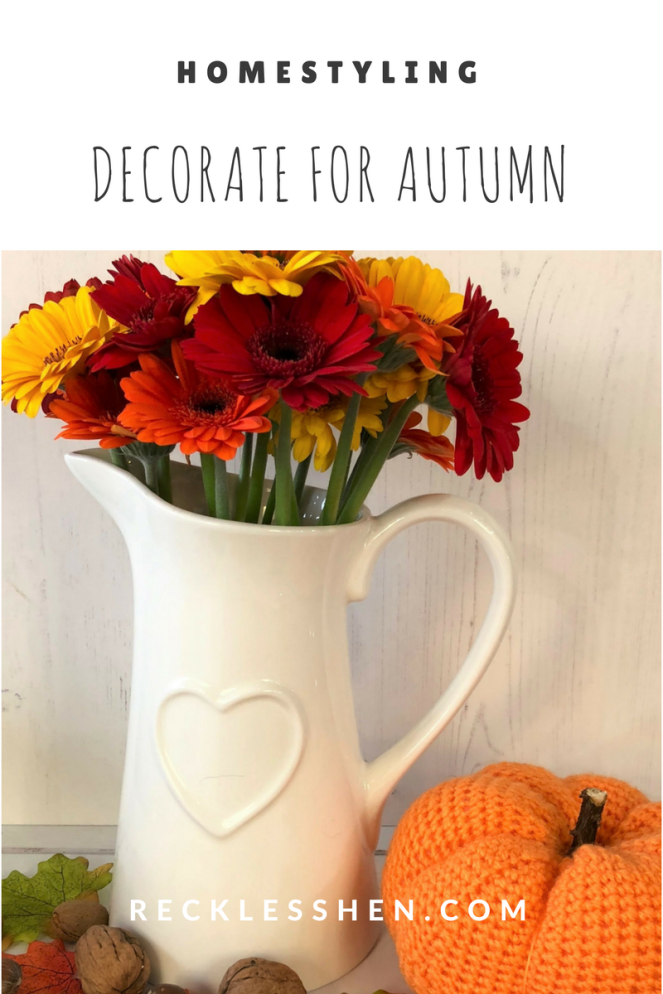
When my kids were smaller I used to have fun being OTT decorating the house for Halloween, the scarier the better. Now that they are older and not that interested in it anymore I was missing the decorating, so I decided a couple of years ago that I was going to decorate with an Autumn theme instead. I have picked up bits and bobs over the last few years and I’ve also made a few things, and each year I bring out whatever bits take my fancy to make the house all cosy and autumnal. I love all the rich reds, oranges, golds, greens and browns that this time of year brings. This year I have added a little leaf garland to the fireplace, added some orange candles from IKEA and put them in with some of the other pretty little things I had and I am pretty happy with the result. The red wall in my main room always comes into its own at this time of year and makes the whole room look very cosy and welcoming.
Decorate your home for Autumn with RecklessHen
I have picked up bits and bobs over the last few years and I’ve also made a few things, and each year I bring out whatever bits take my fancy to make the house all cosy and autumnal. I love all the rich reds, oranges, golds, greens and browns that this time of year brings. This year I have added a little leaf garland to the fireplace, added some orange candles from IKEA and put them in with some of the other pretty little things I had and I am pretty happy with the result. The red wall in my main room always comes into its own at this time of year and makes the whole room look very cosy and welcoming.
Living Room decor with an Autumn feel by RecklessHen
This year I made a few things to add to my collection. I made an Autumn printable that you can download here and I crocheted a few pumpkins too. You can find the tutorial for them here. I also bought a new candle that I spotted in TKMaxx. It is a lovely orange pumpkin spice scented candle that says ‘Give thanks with a grateful heart’ on it and the gold lid has the cutest, teeny, tiny pumpkin on it. I love it. You can see it in some of the photos below.
In the rest of the house I added in some Hydrangeas from a friend’s garden, a jug full of Gerberas, some silk autumnal leaves, some greenery from my garden and some nuts and conkers. I love to settle down at night with the fire on, the candles lit and do some crocheting or knitting while the wind is howling outside and I’m all cosy indoors.
When it comes to looking for inspiration online for my Autumn decor a few of the places I love to check out are Pinterest, Country Living, Martha Stewart, Pioneer Woman, Here Comes The Sun and Ideal Home. I also find that garden centres can be full of inspiration. I don’t know much about plants myself but their fabulous displays mean I don’t need to as I can just pick plants that are in their displays and know they will work in my autumn decor as well. We have some amazing garden centres here in Northern Ireland and three of my favourites are Creative Gardens, Camerons and Hillside Nursery. Here are some of the photos I took this year when searching for inspiration.
And did I mention that they all have lovely coffee shops and it would have been rude not to take the time to sample the coffee and cakes while I was there 🙂 Speaking of coffee, when RecklessHen went on a roadtrip the other day we stopped off at Starbucks for our first Pumpkin Spice Latte of the season and Heather delved into her large handbag and out came some handmade autumnal props ready for an Instagram photo. The pattern for the leaves and acorns is from Just Pootling and the conkers were just made up as we went along.
Autumnal props for our Pumpkin Spice Latte
Do you decorate for Autumn? Where do you get your inspiration from?
I don’t know about your house but in my house at meal times I often hear that delightful refrain from my kids of “Yuck, I’m not eating that!” This is particularly true when vegetables are involved. There are not that many meals that everyone in this house enjoys with no complaints whatsoever but my Sweetcorn Chowder is one of them and for that reason it is, as far as I am concerned, the best Sweetcorn Chowder recipe ever.
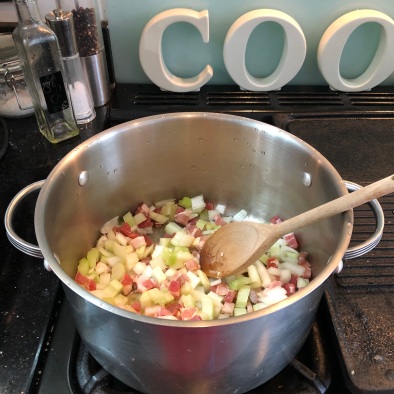
How to make Sweetcorn Chowder by RecklessHen
I can be sure that whenever I make this, there will be no complaints at all, just happy faces and full tummies. I don’t remember where this recipe originally came from but I am sure it was inspired by something I read or saw somewhere. I have been making it for so long now that I tweak it from time to time or add something extra now and then, but the basic ingredients and quantities stay much the same. The recipe below is just how I make it, timings may be different depending on your cooker.
Ingredients:
1 onion, diced
2 long celery sticks (or 3 short ones), diced
1 pack of 12 slices of smoked pancetta, cut up into small strips (or 2 of the small packs of ready cubed smoked pancetta)
A knob of butter or some olive oil
2 vegetable stock cubes
3 medium sized potatoes, cut into equally sized chunks
3 large corn on the cob (or you can use a couple of cups of frozen sweetcorn)
200ml double cream
1 litre of boiling water
Salt & pepper to taste
I have been known to substitute bacon for pancetta and have used milk when I have had no cream.
Method:
Put the onion, celery and pancetta into a large pan with the knob of butter (or oil) and sweat it slowly over a medium heat until the onion and celery have softened and the pancetta is starting to change colour. I usually do this with the lid on and check it regularly. It takes about 10-15 minutes. If it looks like it is starting to stick I add a little water to stop it.
Once the onion and celery have softened I make up the vegetable stock cubes in a litre of boiling water and add it to the pan. I turn up the heat and leave this to come to the boil and then I add in the potato. The potato acts as a thickener so if you like thicker soup you might want to add another and if you like thinner soup you might want to use one less. Trial and error is how I ended up adding 3 potatoes, as we like our soup quite thick.
Turn down the heat slightly and continue to cook until the potato is soft. While the soup is cooking prepare the corn on the cob by stripping the kernels off the cobs. If you are using frozen sweetcorn you won’t need to do this step. Once the potato is soft add the sweetcorn and continue to cook for another 10 minutes. At this stage you can add a little more boiling water if required.
Take the soup off the heat and use a handheld blender (or you could use a jug blender) to blend the soup until it is a consistency you are happy with. We like ours quite chunky but I know other people prefer it smoother so you can blend it as little or as much as you like. I do recommend that you do this very, very carefully as more than once I have ended up splattered with boiling hot soup.
Once it has been blended I put it back on the cooker, add the cream, heat it through for a minute or two and it is ready to serve.
We like ours with heaps of crusty bread just out of the oven. I often buy those packs of bread that are ready to bake but equally often I just buy a french stick or some other crusty loaf and heat it up.
I hope you can follow this and it turns out delicious. If you use the recipe I’d love to know.
Feeling very autumny, I spent a few happy hours last week on a Pinterest safari looking for crochet patterns for autumnal bits and bobs. I found loads of fabulous leaf patterns, acorn patterns, squirrel and hedgehog patterns and of course pumpkin patterns. A crocheted pumpkin seemed a good place to start as the patterns were all pretty similar and straight forward and I knew I had some orange wool in my extensive stash. So I got a cuppa, my wool and my hook and settled down to start only to realise that the pattern I had chosen was for chunky wool and mine was DK. Not to be beaten I decided to wing it and try to come up with something that would pass as a pumpkin. I was really happy with how it turned out and thought I would share the pattern in case it is useful for you. First, here is what it looks like.
How to crochet an Autumn Pumpkin by Recklesshen
You will need:
Double knitting wool
4mm hook
Toy stuffing
Twig about 1cm thick and about 3-4cm long
Hot glue gun
Wool needle
Wordart & Crocheted Pumpkin by RecklessHen
Crocheted Pumpkin by RecklessHen
Crocheted Pumpkin by RecklessHen
Here is how I made mine.
Make a slip knot and place it over your hook.
Chain 68.
Slip stitch into the starting chain to form a circle.
Chain 2. (This becomes your first DC)
Work a DC into the same stitch as your slip stitch.
Work a DC into each stitch around your circle to the end.
Slip stitch into the 2nd chain of the chain 2 at the start of the previous round.
*Chain 2.
Work a DC into the same stitch as your slip stitch.
Work a DC into each stitch around your circle to the end.
Slip stitch into the 2nd chain of the chain 2 at the start of the previous round*.
Repeat from * to * until your crochet measures as long as you want it to be.
The longer the crochet is the taller your pumpkin will be. I kept going until mine measured around 30cm.
Finish on a slip stitch and fasten off your wool.
You will now have a crocheted tube.
Using the same colour wool and a wool needle, do a running stitch around the edge at the bottom end of the tube. Gently pull the wool to gather the edge until it is as tight as it will comfortably go. Fasten off your wool.
Using toy stuffing, stuff your pumpkin right to the top so that it is full and plump.
Using the same colour wool and a wool needle, do a running stitch around the edge at the top end of the tube. Gently pull the wool to gather the edge until it is as tight as it will comfortably go. Fasten off your wool.
Take a long strand of wool and beginning in the centre of the bottom of your pumpkin, join your wool to the centre and then take it up the outside of the pumpkin and down through the hole in the centre at the top, and out through the bottom.
Pull this strand of wool and you will see it pulling the pumpkin and forming a segment.
Repeat this step, taking the wool up the outside, down through the centre and then pulling to form a segment.
Work your way around the pumpkin until you have as many segments as you want. I mad seven segments on mine.
Fasten off the wool securely at the bottom.
Using a hot glue gun, put some glue on your twig and place it into the hole at the top of your pumpkin.
And viola, you have a lovely autumn pumpkin
If you use this pattern we would love to see a picture of your pumpkins.
Happy Autumn 🙂
I have read so many of those ‘things I have learned’ posts over the years and I always find at least one thing in those lists that I completely get. I was thinking about that the other day and started to make a list in my head of what lessons I had learned in my five decades, and I actually surprised myself when I realised that I had learned some big lessons in my own life. Lessons that totally reinforced what I had read and heard from so many people. It made me ponder about how we can live in different cultures, have very different lives and yet we can have similar experiences. So I decided that I was going to commit my list of things I had learned to paper (or screen to be completely accurate). This is just my list, I’m not saying it should be yours or telling you how to live your life, it is just my observations on my journey so far.
Anyway here goes my list of 5 things I have learned, in no particular order……..
My mother really was always right, or at least she was right a heck of a lot of the time. The friends she didn’t like turned out to be crappy friends. The decisions she questioned often turned out to be mistakes. The time she wanted to spend with me would be time I looked back on now and treasured. When we are young we think we know it all and I wish I had realised then what I know now. That her advice came from experience and love, that she didn’t want me to make the mistakes she had, that she was only trying to make my life easier. What I would give now to have just one more hour with her. So lesson number one is LISTEN TO YOUR MOTHER.
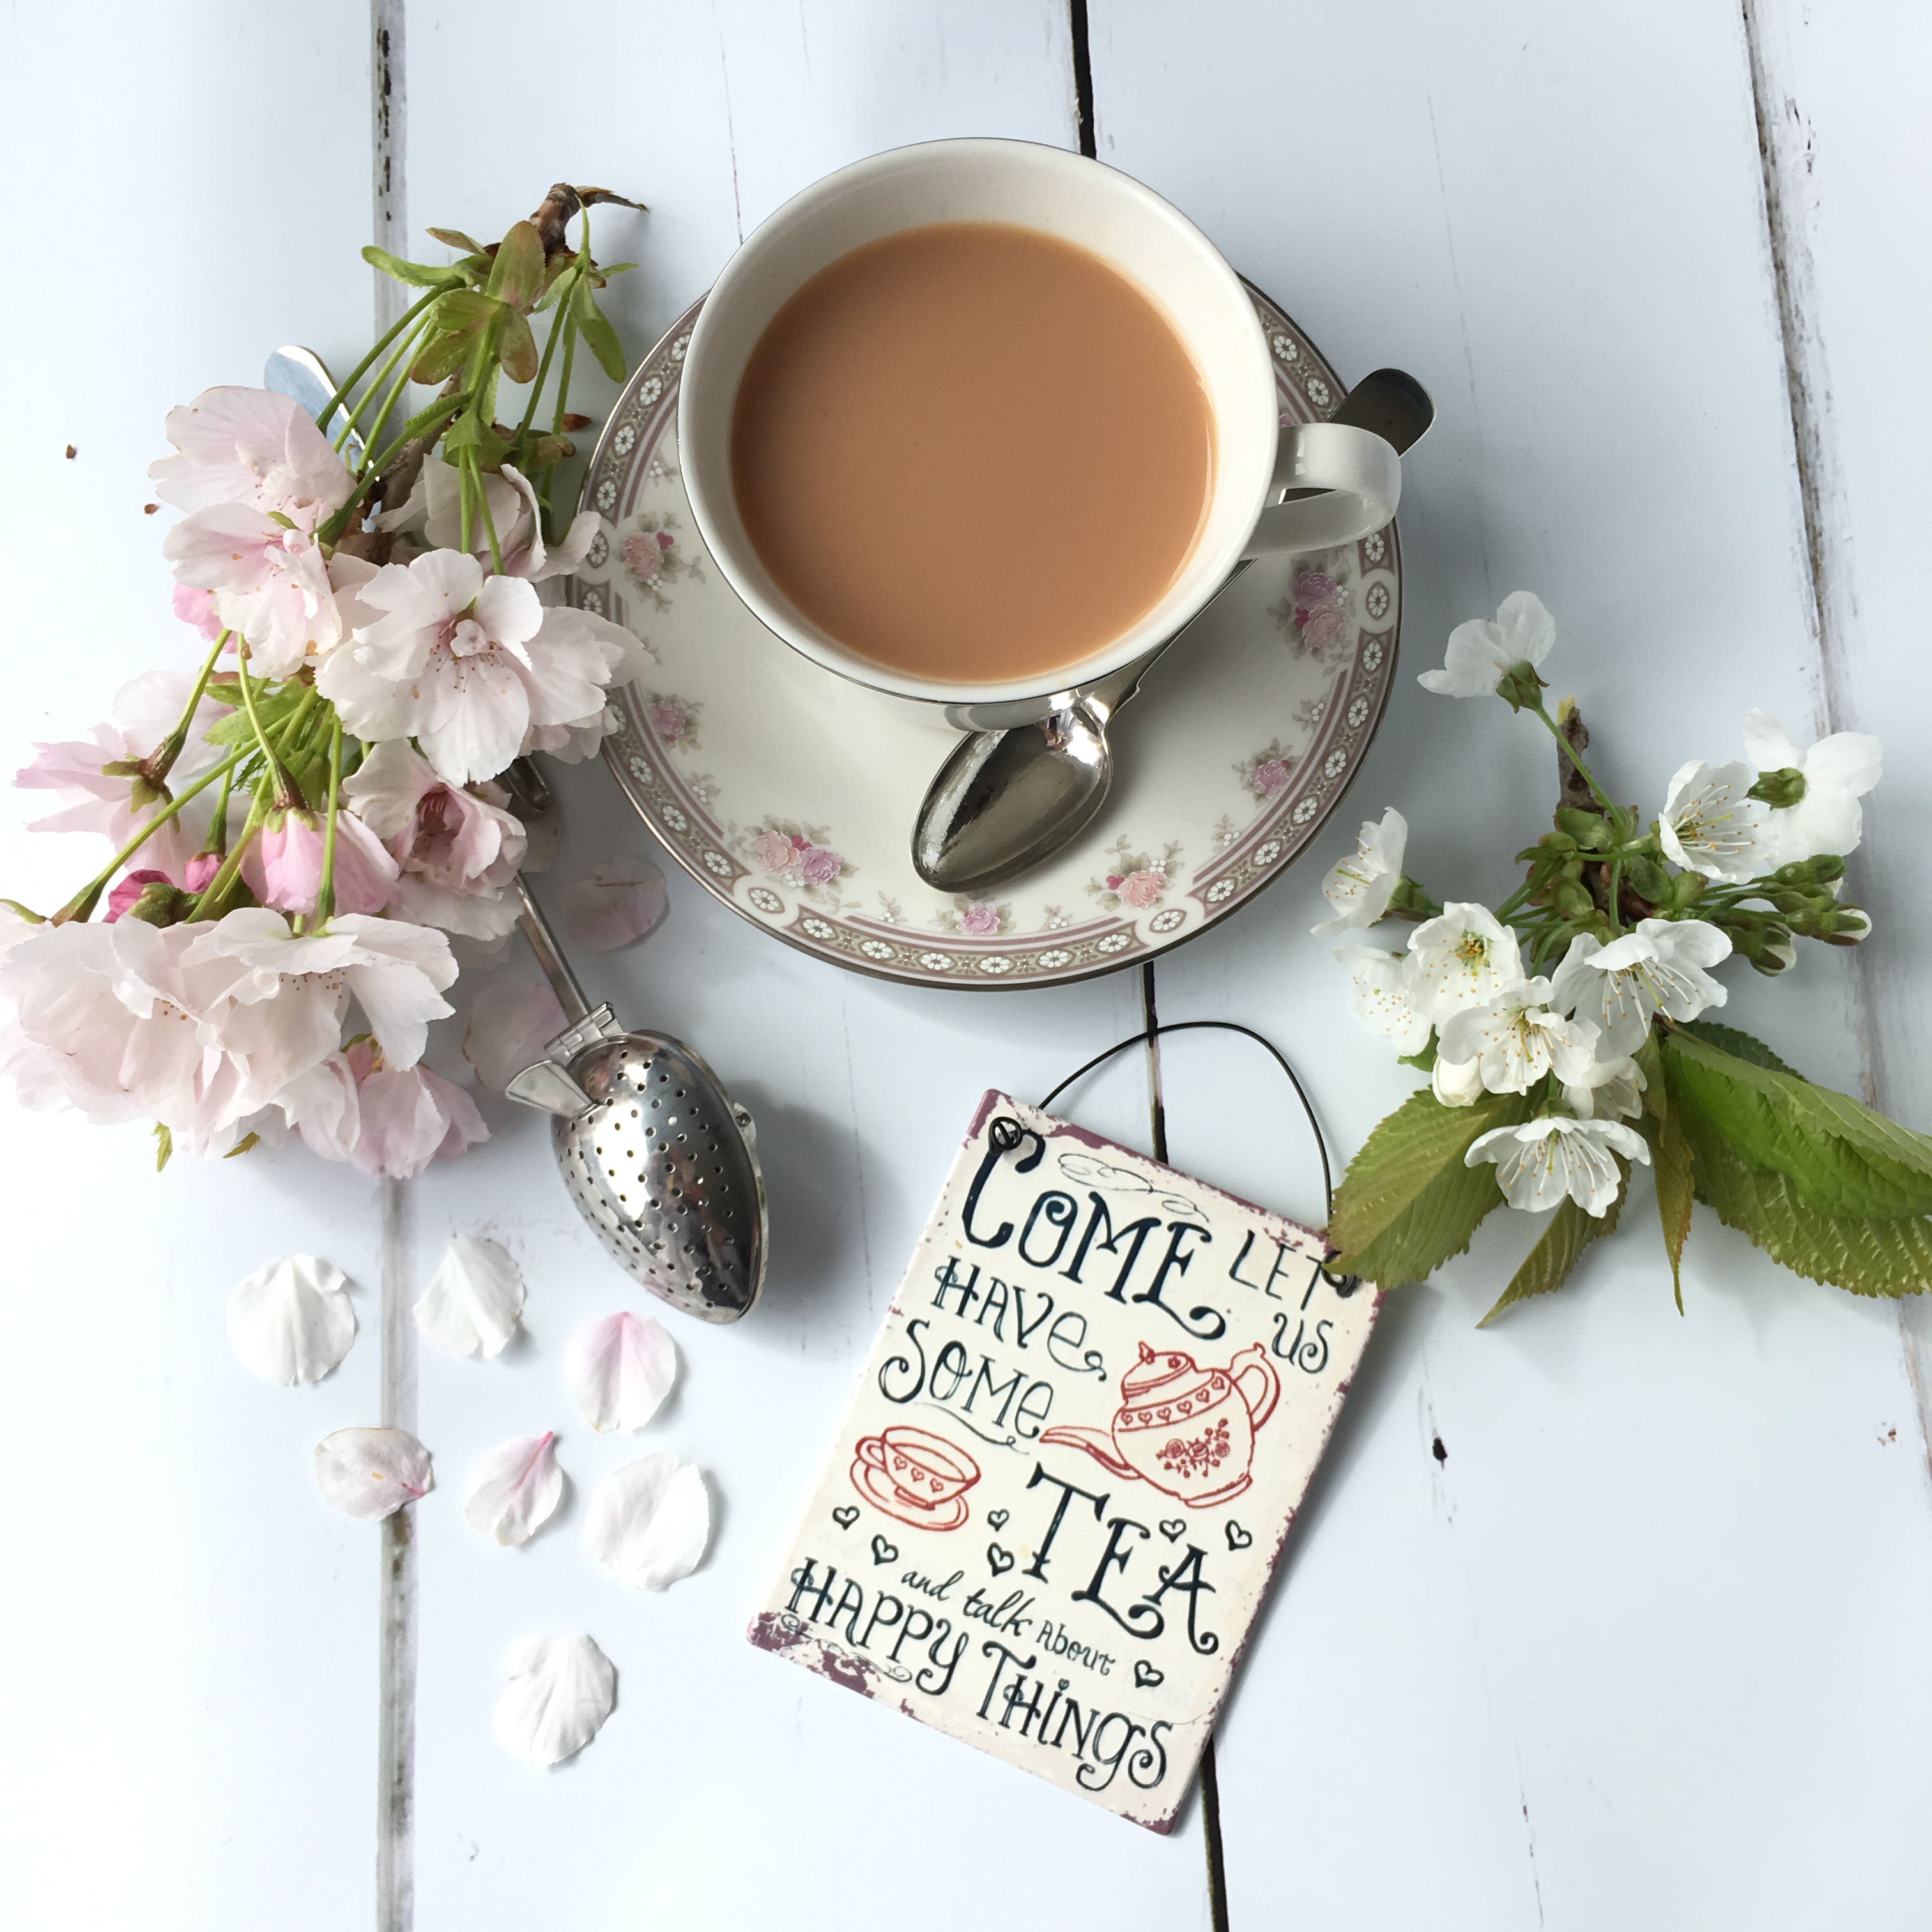
Tea really does make everything better. Now I am not a big tea fan, I’m a latte lover, though I take it with only one shot of coffee and most people say it tastes more like warm milk but that is beside the point. The point is that I have never really got the tea makes everything better thing. I’ve always thought that’s a bit tough on us coffee drinkers and how on earth could a cup of tea make anything better. But I was thinking about it yesterday and I suddenly realised that it’s not the tea that makes everything seem better, its the fact that usually we will be sitting down and sharing that tea with a partner, a friend, a parent or someone else important to us. It is the being with the other person that makes everything seem better, like everything will be OK and no problem is too big to solve. Perhaps I am the only person who didn’t really get this and you all knew what it was about, but I am a very literal person so to me it was really saying that tea actually made things better. Now I can’t believe I didn’t see what it was all about yonks ago. So lesson number two is DRINK TEA (EVEN IF IT’S COFFEE).
Friendship is a two-way street. Now it is inevitable that in the course of our hectic lives juggling a million different things that sometimes the street will be busier one way that the other. That’s OK as long as the traffic still flows both ways. If it turns into a one-way street that is not OK. If one of our friends lets us do all the work, always being the one to call, to organise to meet up, to ring for a chat then that person is not really a friend. It can be hard to step away from a friendship but when it is not adding to your life or making you feel good then maybe it’s time to re-evaluate why you are friends with that person. So lesson number three is BE A GOOD FRIEND.
Life is too short for regrets. This has been my mantra for the last 22 years. I lost someone very close to me through illness back then and in those final days one of the things that she said that really stayed with me was that she had no regrets about her life. I knew instantly that I wanted to be able to say that too and that if I kept on the path I was on that would never be the case. So I gave up my job to become a stay-at-home mum and moved closer to my parents as my dad wasn’t well. It wasn’t easy, to be honest it was really scary stuff, we were doubling our mortgage and halving our income at the same time but it felt right and I have never regretted it for a second. For me all decisions are made using the ‘will I regret it’ measuring stick. I have found that, even when something doesn’t work out, I have no regrets now because I know I made the best decision for me. I am not saying that would work for everyone, we are all different, but for me it works. So lesson number four is REGRET NOTHING.
Don’t waste time worrying what people think of you. It really is true that the people who mind don’t matter and the people who matter don’t mind. It doesn’t matter if you are not wearing the latest trend, are overweight, too short, too tall, too bossy, too quiet, don’t drive the right car, don’t live in the right area, didn’t go to the right school, don’t work in the right job, don’t mix with the right crowd. All those things are just ‘things’ and the people who judge you on them have warped values and empty lives if that is all that matters to them. What matters is how you treat people and what you give back to those around you. It is better to really rock at being you imperfections and all, than striving to be something you are not to try to please people who will always find something else to judge you on. Hold your head high, dance to your own beat and let them shove their judgements. So Lesson number five is (to quote Dr Seuss) “TODAY YOU ARE YOU, THAT IS TRUER THAN TRUE. THERE IS NO ONE ALIVE THAT IS YOUER THAN YOU”
Phew, so that is my 5 lessons and if you got through all that well done.


")

")